Here’s the step-by-step breakdown of the process you’re describing to incorporate front-post stitches into your crochet work:
Starting with a Row of Double Crochet (dc):
Work a row of normal double crochet (dc):
- Start by chaining 2 (this counts as your first double crochet).
- Double crochet into each stitch across the row.
Turn your work when you reach the end of the row.
Creating the Front-Post Double Crochet (FP dc) Stitch:
Chain 2 for your turning chain (as you mentioned, this is one less than the usual turning chain for a double crochet).
Now, for the front-post double crochet (FP dc):
- Yarn over (yo).
- Insert your hook from front to back between the posts of the first and second double crochet of the row below.
- Then, pull your hook from back to front between the posts of the second and third stitches.
This method of inserting your hook is what’s known as “between the posts,” which helps you wrap around the posts and form the front-post stitch.

Complete the FP dc by:
- Yarn over again and pull through (you should have 3 loops on your hook).
- Yarn over and pull through the first 2 loops.
- Yarn over again and pull through the last 2 loops.

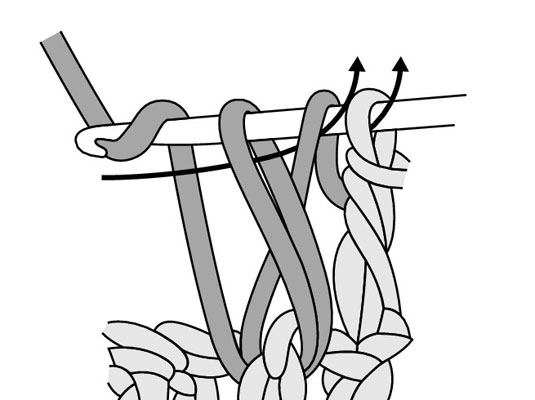
Continue working front-post stitches across the row as needed, then turn and repeat the process for additional rows.
This technique will give your project a lovely textured, raised effect along the surface where the front-post stitches are worked.
Tips:
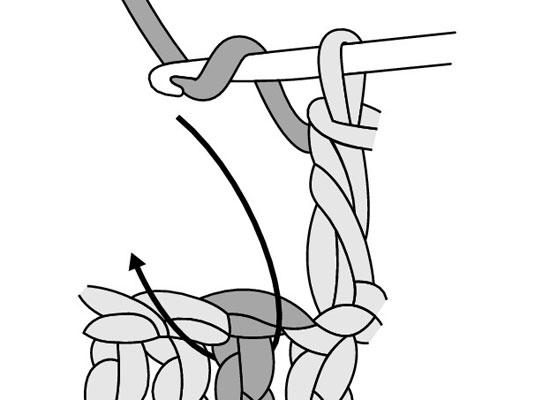
- Spacing: Make sure to keep your tension consistent, especially when working between stitches like this. The post stitches will form a noticeable texture that might pull the fabric in a bit, so it’s good to check your work as you go.
- Pattern Consideration: If you’re alternating between regular double crochet and front-post double crochet stitches, it will create a beautiful pattern where the post stitches pop out, and the regular dc stitches stay flat.
Let me know if you’d like any help with visualizing this or further pattern guidance!